


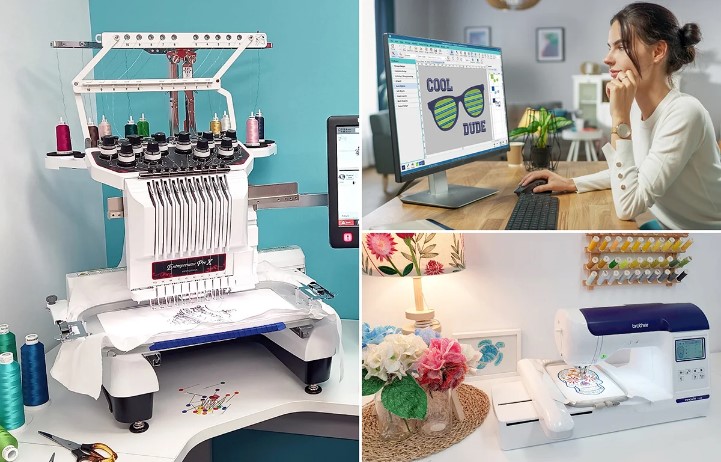
How to Get Smooth Embroidery Files from Simple Pictures
Many people have a logo, sketch, or photo they want to stitch on fabric. It may be for a shirt, cap, bag, or gift item. But a picture file cannot run on an embroidery machine by itself. The image must first be changed into a stitch file.
That is why Image to DST Conversion is an important step for clean machine embroidery. It turns a simple picture into stitch data that a machine can read. When done the right way, the final design looks smooth, neat, and professional.
Why Pictures Need Conversion First
A picture file and an embroidery file are not the same thing.
Picture Files Show:
- Colors
- Shapes
- Art details
Embroidery Files Need:
- Stitch path
- Stitch type
- Stitch order
- Needle moves
- Color stops
Machines follow stitch commands, not images.
What Is a Smooth Embroidery File?
A smooth file runs well and gives clean results.
It Should Have:
- Clean edges
- Good stitch flow
- Balanced density
- Correct color stops
- Less thread breaks
A strong file saves time and fabric.
Why Some Picture Files Fail
Many people try to use any image file and expect perfect stitching.
Common Problems:
- Blurry logos
- Tiny details
- Low quality images
- Poor color contrast
- Uneven shapes
Bad source art often creates bad stitch files.
Step 1: Start with a Clear Picture
The better your image, the better your file.
Best Choices:
- High-quality logo
- Clean artwork
- Sharp text
- Clear lines
Avoid:
- Screenshots
- Blurry phone photos
- Tiny web images
Good input matters a lot.
Step 2: Clean the Artwork
Before digitizing, many images need cleanup.
Cleanup Can Include:
- Removing noise
- Fixing rough edges
- Sharpening text
- Improving contrast
This helps the stitch file look better.
Step 3: Simplify Small Details
Embroidery has limits. Very tiny details may not stitch well.
Often Removed or Changed:
- Tiny dots
- Thin lines
- Very small text
- Busy shading
Simple art usually stitches cleaner.
Step 4: Choose the Right Stitch Types
Each part of the design may need a different stitch.
Common Stitch Types:
Satin Stitch
Good for letters and borders.
Fill Stitch
Good for larger solid areas.
Running Stitch
Good for outlines and light detail.
Experts choose the best mix for each shape.
Step 5: Set Proper Stitch Density
Density means how close stitches are placed.
Too Much Density:
- Stiff fabric
- Thread breaks
- Puckering
Too Little Density:
- Gaps
- Weak coverage
Balanced density gives smoother results.
Step 6: Add Underlay
Underlay is a support stitch under top stitches.
It Helps:
- Hold fabric steady
- Support top thread
- Improve shape
- Reduce pulling
This hidden layer improves quality.
Step 7: Plan Stitch Order
The machine follows a path.
Good Order Means:
- Less trims
- Faster runs
- Better alignment
- Cleaner finish
Poor order can create messy results.
Real Experience: Why Manual Work Beats Auto Tools
Auto software can make a fast file, but not always a good one. Many auto files use too many stitches, rough paths, or poor text settings.
Real digitizers adjust each part by hand. Teams like Absolute Digitizing know how fabric reacts and how machines behave during real production runs.
That hands-on skill often makes the biggest difference.
Common Problems and Fixes
Rough Edges
Cause:
Bad stitch angles or poor artwork.
Fix:
Clean design and better pathing.
Thread Breaks
Cause:
Too many dense stitches.
Fix:
Lower density and smoother paths.
Small Text Closes Up
Cause:
Text too small for stitching.
Fix:
Increase size or simplify letters.
Fabric Pulling
Cause:
Heavy stitching without support.
Fix:
Use backing and underlay.
Why Fabric Type Matters
The same file may stitch differently on each fabric.
Cotton Shirts
Stable and easy.
Caps
Need a special center-out setup.
Towels
Need stronger coverage.
Stretch Wear
Need soft settings and support.
Good files are matched to the material.
Why Testing Is Important
Even good files should be tested first.
Test Sewouts Check:
- Shape quality
- Stitch flow
- Size accuracy
- Color order
- Fabric reaction
Testing helps avoid costly mistakes.
How to Improve Results at Home
If you run your own machine, these tips help.
Use Fresh Needles
Old needles can snag thread.
Use Quality Thread
Cheap thread breaks more often.
Hoop Fabric Tight
Loose fabric shifts.
Clean the Machine
Lint can affect stitching.
Slow Down for Detail Work
Fine areas may run better slower.
Why Smooth Files Help Businesses
Clean embroidery improves products and brand image.
Better Files Mean:
- Better customer trust
- Fewer remakes
- Faster orders
- Cleaner logos
- More repeat buyers
This matters for shops and clothing brands.
Best Uses for Picture-to-Stitch Files
Popular Items:
- Polo shirts
- Caps
- Bags
- Jackets
- Uniforms
- Gift towels
A clear file works on many products.
Why Experience Matters
Embroidery is more than clicking convert.
Experts Learn From:
- Many machine runs
- Different fabrics
- Real mistakes
- Customer feedback
That real knowledge improves file quality.
Trusted teams like Absolute Digitizing use practical experience to create stitch-ready files that run smoother and look cleaner.
Mistakes Beginners Often Make
Avoid these common errors.
Using Low-Quality Images
Bad art causes bad results.
Choosing Tiny Text
Small letters may fail.
Ignoring Test Runs
Always sample first.
Using One File for All Fabrics
Different items need different settings.
EEAT in Embroidery File Creation
Great embroidery support follows trusted values.
Experience
Real machine knowledge.
Expertise
Knowing stitches, density, and fabric behavior.
Authority
Consistent clean results.
Trustworthiness
Reliable files and honest service.
These values build confidence.
Final Thoughts
Getting smooth embroidery files from simple pictures is possible when the process is done right. Start with clear art. Clean the image. Simplify tiny details. Use the right stitches, density, and underlay. Always test before full production.
A picture may look simple, but turning it into a great stitch file takes skill. When done well, the result is smooth, sharp, and ready for professional embroidery on many products.


Leave a Reply